JUNGLE BOOK – A Photoshop Manipulation
There are times when you will wish to create a composition where you would like to see your dear ones comfortably sitting with some ferocious animal as if there exists some sort of friendship between them which is, in normal circumstances unimaginable.
In this tutorial I’ll show you how easy it is to create such a composition.
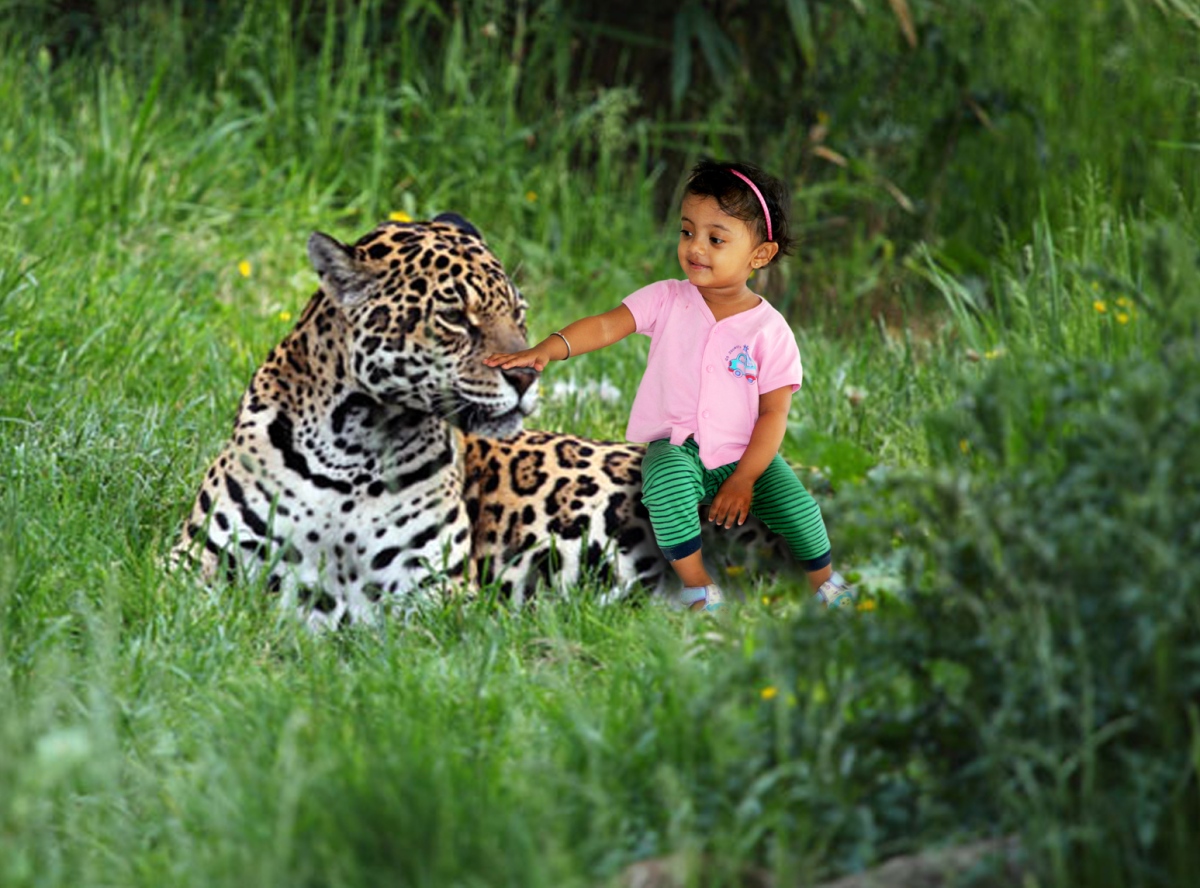
What you will be creating:

Tutorial Assets
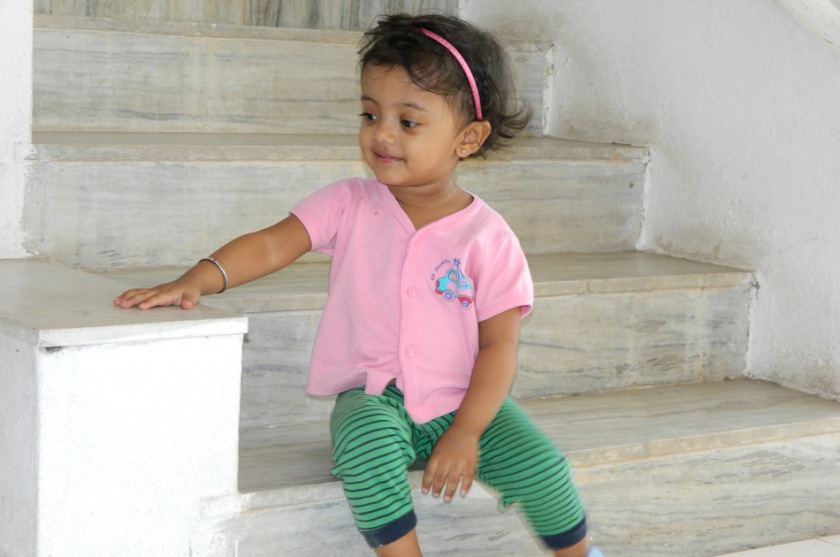
1. This tutorial requires a photo of a child sitting and extending his/her right hand.
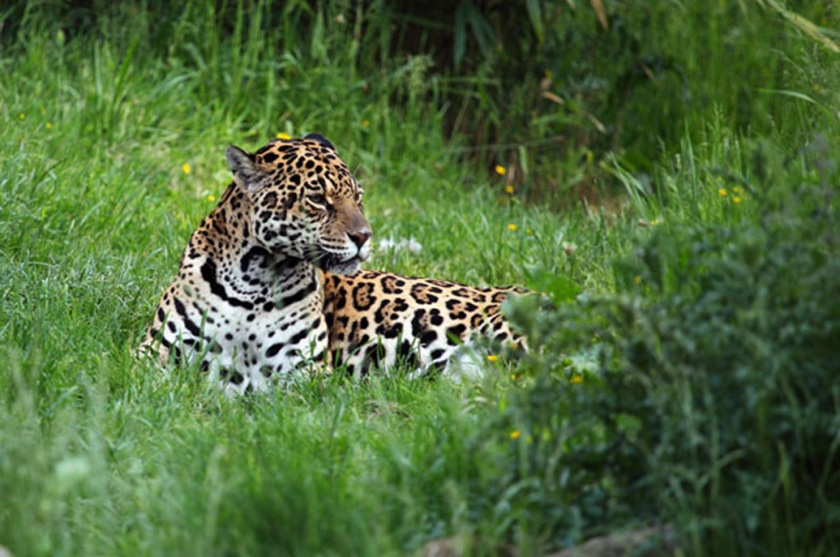
2. A photo of a ferocious animal sitting calmly amidst a jungle.
For the purpose of this tutorial, I have chosen the following images..
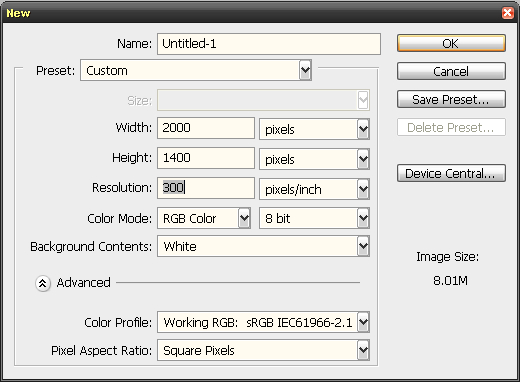
STEP 1
Open a new file with
Color mode- RGB, 8 bit
Resolution – 300 pixels/inch
Width – 2000 pixels
Height – 1400 pixels
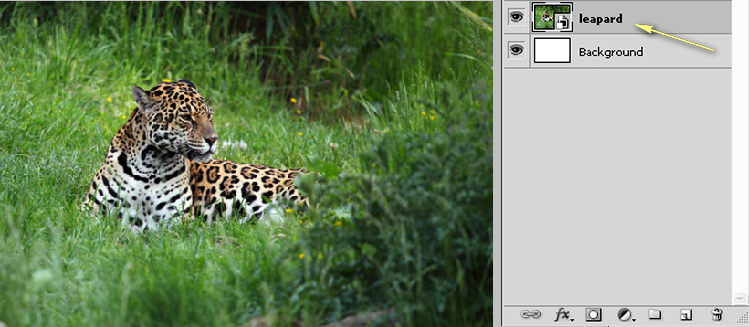
STEP 2
Now place the image no.2 i.e. the leopard sitting calmly in a jungle on the new canvas created and position and scale it suitably.
STEP 3
Now the turn for the child to be placed over the leopard. In this case the child is the daughter of my sister-in-law.
I directly placed the image of the child over the layer of the leopard and positioned, scaled & rotated suitably.
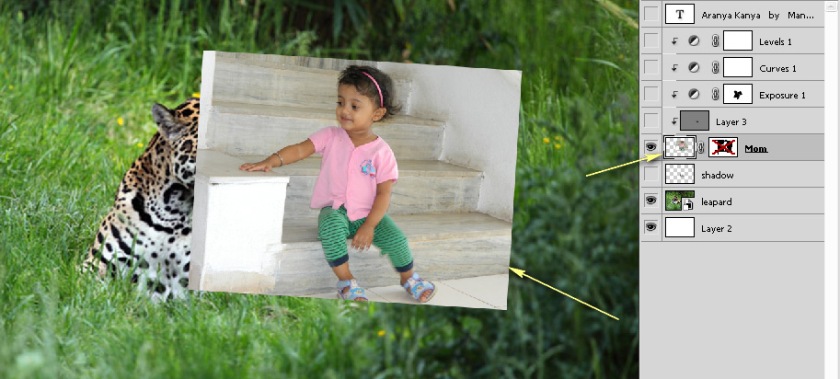
STEP 4
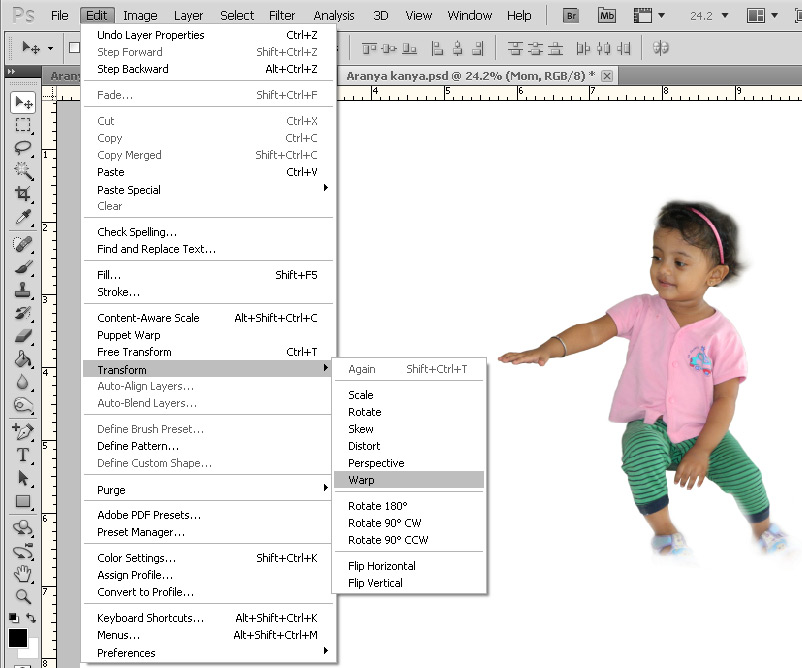
To remove the background of this image I used the layer mask tool with a hard brush having opacity of 100%, then soften the edges to some extent with Blur Tool having suitable hardness and strength. If the right hand of the child is not properly positioned over the nose of the leopard it can be corrected with the help of the warp tool.
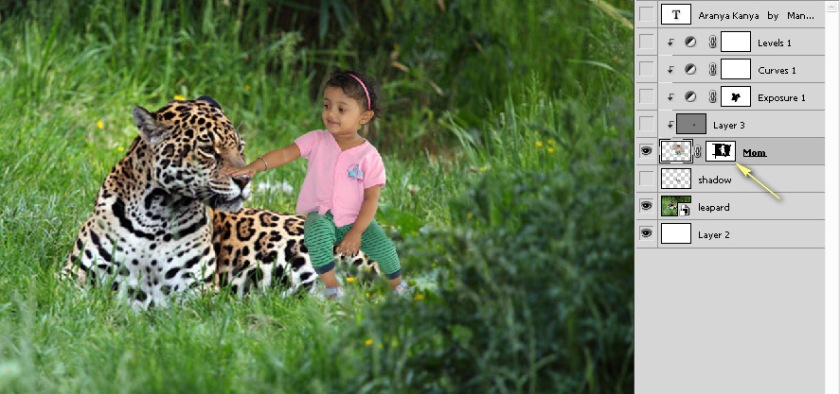
STEP 5
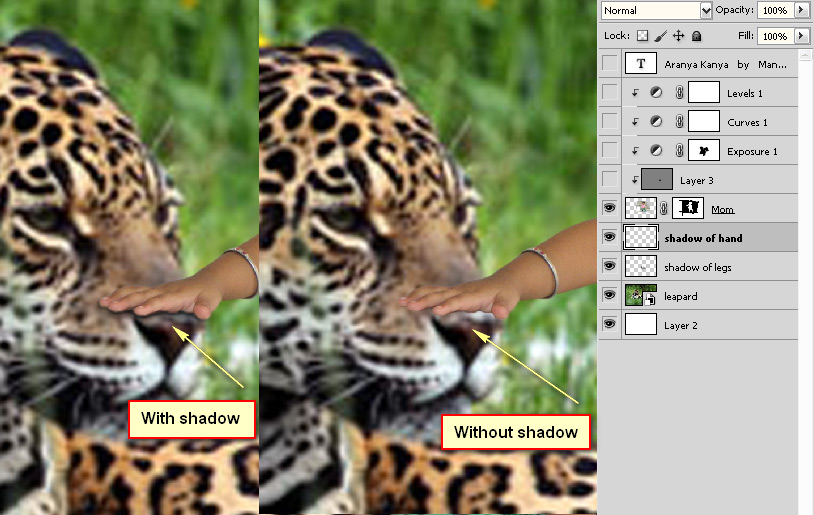
The image of the child sitting over the leopard is not looking realistic as if she is floating over the leopard. In order to make the child’s figure over the leopard more realistic I created two new blank layers in between the layer of the child and the leopard to create shadows. On the first blank layer, I made some shadows of the child’s leg on the leopard with a soft brush of hardness 6%, opacity 8% and mode: Overlay and darkened some portion of the leopard’s figure.
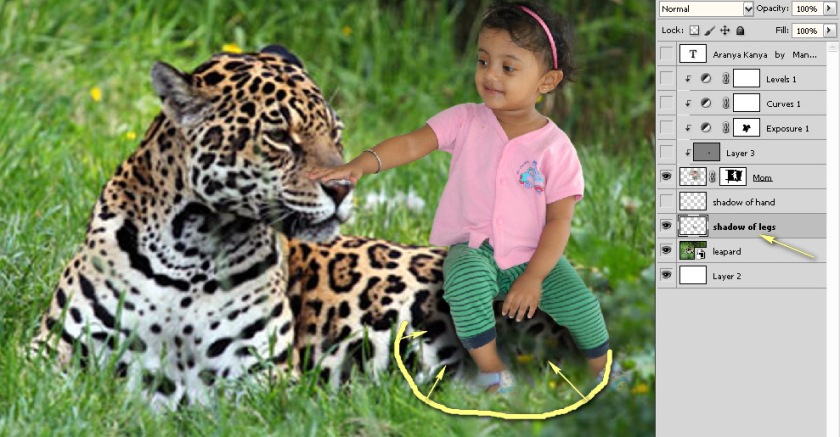
On the 2nd blank layer, I repeated the above procedure to create shadows for the hand over the nose of the leopard. (Soft brush of hardness 8%, opacity 18% and mode: Overlay).
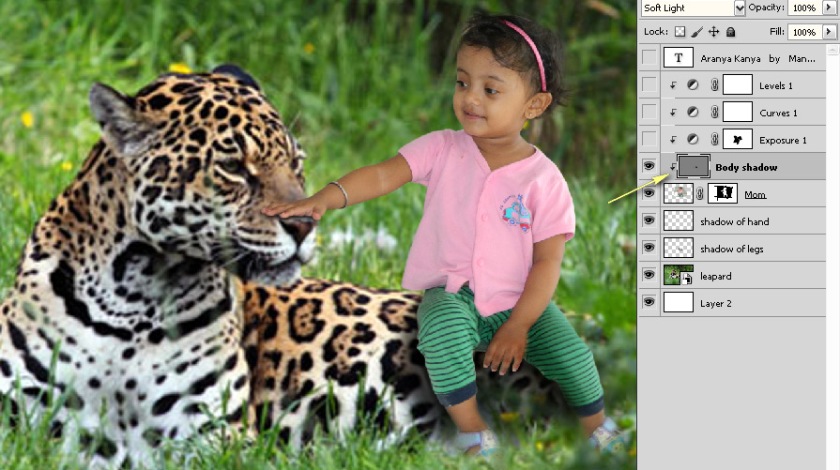
STEP 6
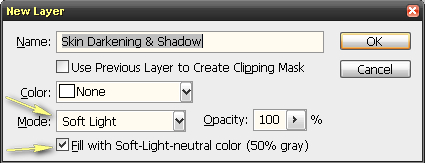
In order to make the child’s figure even more realistic I performed another shadow making, this time on the hands and legs of the child so that the direction of the light coming on the whole composition looks symmetric. To do so, I made a new layer with clipping mask above the child’s layer with the following specification:
Mode – Soft light
And “Fill with soft light neutral color ( 50% gray)” Box checked.
Now with the burn tool with Hardness 2%, Exposer 45% and Range:Midtones I darkened some portion of the hands and legs to create shadows on those parts of the child so that it seems light is coming symmetrically.
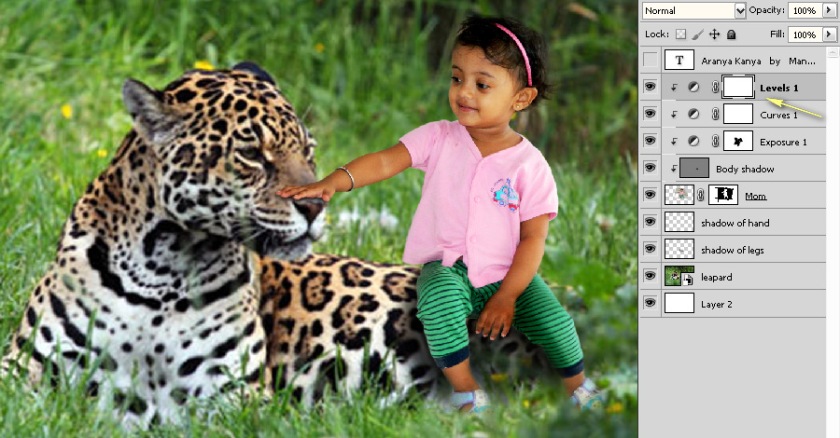
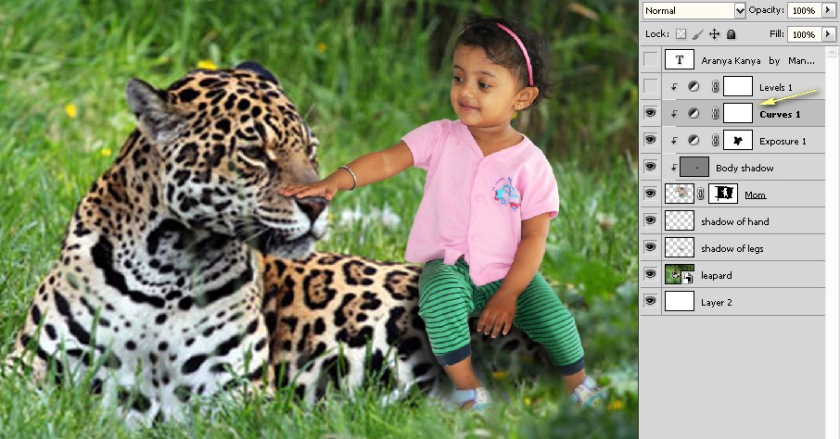
STEP 7
And finally I made 3 adjustment layers of Level, Curves & Exposer with clipping mask to enhance and adjust the image of the child with the surrounding.
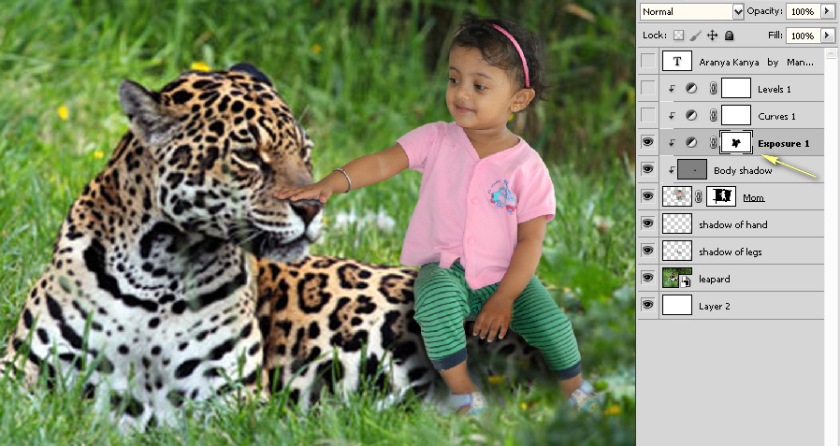
Done!
And now I am finished! With these techniques, you can create some stunning and unique personal photographs and share with your friends and family members!
The final outcome..
Thank you for visiting PICSEDIT. I’ll be uploading many more such type of simple and interesting photoshop tutorials in future which will help you to manipulate your personal photos to make them really interesting, fun and unique.
If you have any comments or questions then please post here.
If you liked the tutorial then please press the LIKE button.

The site helps me to understand how realistic photo composition can be created by assembling just 2 or 3 photos
LikeLike
@Arpita- Yes. It is possible to create stunning photo manipulation with just 2 or 3 normal photos. In coming days I’ll try to post many such interesting tutorials.
LikeLike
OMG!what a manipulation of photo.so nicely done.I am waiting for more such photos. thanks for sharing this tutorials
LikeLike
Thank you for your gracious comments. The next tutorial will be published soon!
LikeLike
Lovely. This looks surreal.
LikeLike
Thank you for your gracious comments.
LikeLike