
Shark Attack – A Photoshop Manipulation
What You’ll Be Creating

Tutorial Assets
This tutorial requires the following images:
- A background image of a boat with passengers sailing through the bay.
- A shark jumping out of the sea.
- A photo with large water ripples.
- A photo of a pointing hand.
For the purpose of this tutorial, I have chosen the following images..


STEP 1
Open a new file with:
Color mode- RGB, 8 bit
Resolution – 300 pixels/inch
Width – 2200 pixels
Height – 1600 pixels

STEP 2
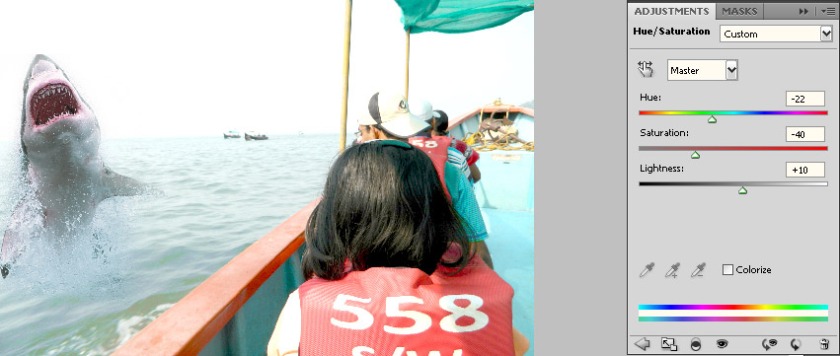
Now place the background image of the boat on the new canvas created and position and scale it suitably.Then make 3 adjustment layer of Level, Exposer and Hue & Saturation with clipping mask to enhance the image.


(background hue)
STEP 3
Now place the image of the jumping shark over everything and position, scale & rotate it suitably.
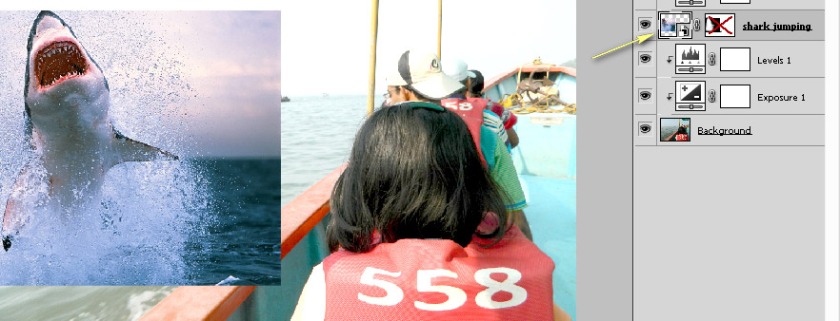
To remove the background of this image I used the layer mask tool and very carefully blended it with it’s surroundings with a soft brush having opacity of 28%,hardness 0%.
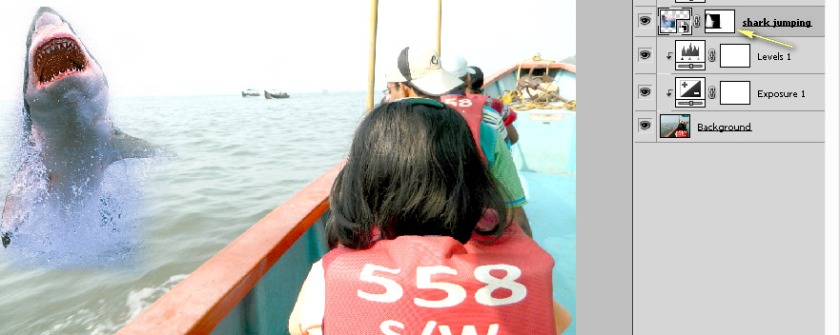
And to match the lightness, hue and saturation of the jumping shark with it’s surroundings, I made one adjustment layer with clipping mask of hue & saturation and suitably adjusted those properties.
STEP 4
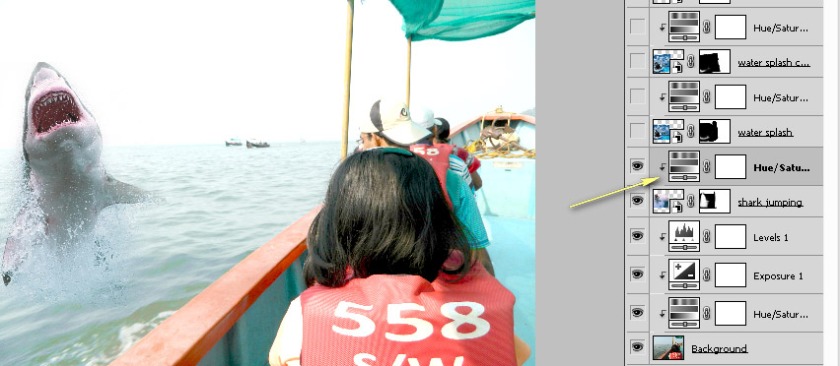
Now notice that even though the shark is jumping out of the sea but there are no water ripples around that area. So, to make water ripples I placed the photo of the shark with water ripples at the top of the layer stack and suitably scaled and rotated it.
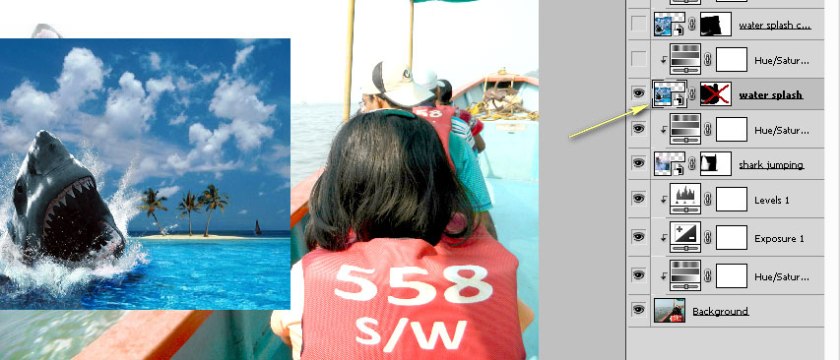
Then again I used the layer mask tool with soft brush to separate out only the water ripple portion and perfectly blend it with the surrounding water.
And to match the lightness, hue and saturation of the water ripples with it’s surroundings, I made one adjustment layer with clipping mask of hue & saturation and suitably adjusted those properties.


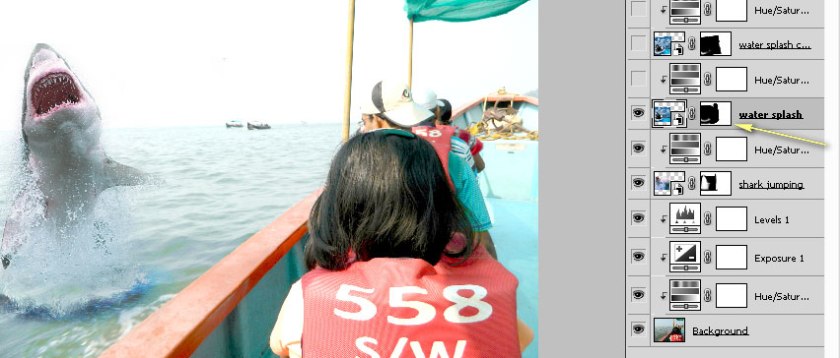
And to make another water ripple I duplicated the previous layer of water ripple, then scaled, rotated and masked it suitably.

And as usual to match the lightness, hue and saturation of the water ripples with it’s surroundings, I made one adjustment layer with clipping mask of hue & saturation and suitably adjusted those properties.

STEP 5
In order to make the characters on the boat look more responsive with the evolving situation, I placed a pointing hand on the first character (who is no one but my elder daughter).

Then again I used the layer mask tool to keep the required length of the hand and blend it with the surroundings.
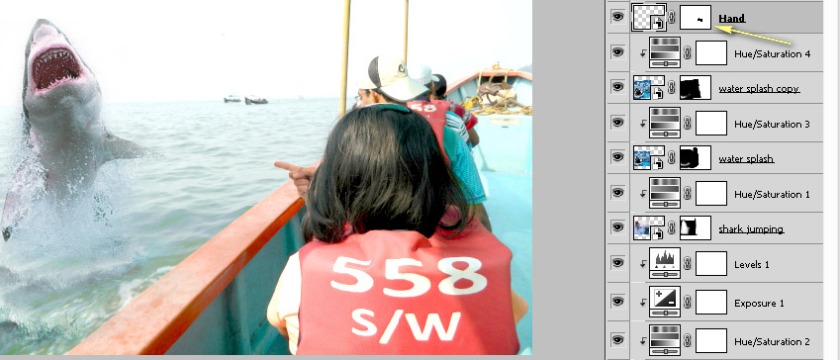
Then I made a adjustment layer of Level with clipping mask to enhance and adjust the image of the hand with the surrounding.

Done!
And now I am finished! Take these techniques and go apply them to photos of your friends and family members to create some fun, unique and stunning images!
The final outcome..
Thank you for visiting PICSEDIT. I’ll be uploading many more such type of simple and interesting photoshop tutorials in future which will help you to manipulate your personal photos to make them really interesting, fun and unique master pieces!
If you have any comments or questions then please post here.
If you liked the tutorial then please press the LIKE button.

Well done
👍👍
LikeLike
Thanks.
LikeLike
Nice edit…
LikeLike
Thanks.
LikeLike
Nicely done
LikeLike